Since a couple of people have asked about how I put together the Learner Activity Hubs for OpenEdMOOC and YogaMOOC, I thought I would put some of the specifics into a blog post for reference (and to help myself remember later how I did it if we ever do another one). Many of the basics are covered in Alan Levine’s most excellent guide to setting up a network hub, so I will only really cover the few things that I did in addition to those instructions. I also won’t cover too much on where to find options in in WordPress – hopefully you can find that easily online, or already know how to do things like add categories, edit posts, upload images, etc.
But first, I want to go over some unique considerations for our learner hubs. The method I describe here has some extra steps involved due to some of the parameters I wanted to have for the hub. You don’t have to have any or all of these parameters in mind. But what I wanted to have unique for these hubs included:
- No wall of text. It is pretty easy to dump all course blog posts in one place and have a never ending scroll of text. But that is hard on the eyes and a little counter productive to getting people to connect. Also a bit dehumanizing to the individual posts.
- Link back to individual websites. The wall of text also discourages people from going to individual blogs, and seeing them as unique individuals. So I wanted to have a theme that at most displayed the post titles, linking back to the source website.
- Images or graphics to humanize each link. If at possible, I wanted pictures of people to link back to their blogs. This introduced a few unique challenges with technical limitations, but I will discuss work-arounds below.
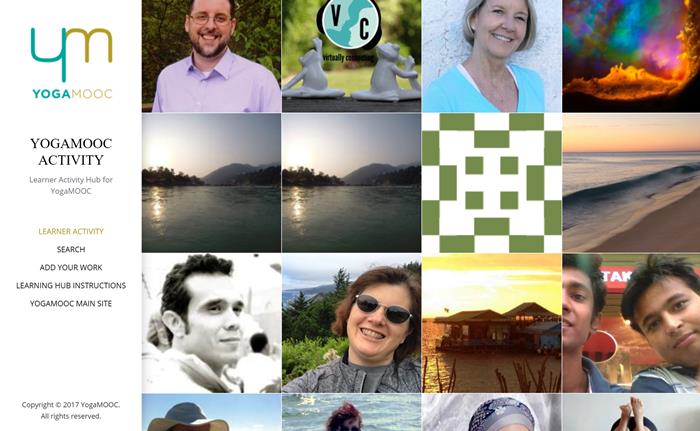
The basic flow of the work would be that participants that want their work to go into the Hub (this is voluntary) would fill out a form to get me the details about their blog. I would get the results of that form. I would then create a Category for each person (based on the name or a pseudonym they give me), attach a featured image to that category (one that they choose), connect that category to an RSS feed from their blog, and let the magic happen. That way, when they create a post, an image of them with a link to their blog post is added to an image grid of blog posts. I love the results, but the process to get there is a little more involved than I thought it would be.
Setting Up the Hub
With all of that in mind, I selected a theme and some plugins to make those goals happen. Somewhat. Here is what I chose:
- FeedWordPress plugin. This is a must have for the Hub – see Alan’s instructions above.
- Morphology Lite Theme. This one had a nice image-based front page blog grid, although you can’t read the titles until you mouse over each image individually. That part is a bit annoying – I would like to find one that has the image with the text imposed over it. But this theme does the basics of what I need it to do well.
- Category Featured Images Extended plugin. This allows you to associate an image with a category – this is part of the process for creating the grid front page that I will get into below. FeedWordPress can’t pull in featured images, and most people don’t use them anyways, so this is a way to get the images that the front page of Morphology Lite needs added automatically
- Ajax Search Lite plugin – as the YogaMOOC Learner hub grew, it became hard to find certain people’s work. This plugin seems to work well as an intuitive search. See the results here. However, I couldn’t get it to work on OpenEdMOOC, which had more plugins than YogaMOOC. It may not play well with some plugins.
The first step was to install Morphology Lite and set up my installation like their demo was set-up – they have some handy instructions here. For YogaMOOC, the blog hub is the front page. For OpenEdMOOC, the blog hub is not the front page. It can be set up either way. One thing to note: there is a setting to tell how many images are on the front page (found in Appearance > Customize > Blog Options > “Image Post Template Count”), and it is initially set pretty low. If you are expecting a lot of posts, you might want to set it high (I currently have YogaMOOC set to 600 with no problems).
Next is to set up the FeedWordPress plugin. I pretty much follow Alan’s instructions above except for one change: I don’t set a default category for all syndicated posts. I do that for each participant individually so they get their own unique category (and make sure all incoming categories are converted to tags as Alan’s instructions say). The reason for this will become apparent below.
Also, you can choose to set up the syndication update scheduling how you like. Because the OpenEdMOOC Hub is smaller, I have it set up like Alan recommends. Because the YogaMOOC is so large, there are typically a few problems with updating automatically. I have to update that one manually each day to deal with those issues.
The Category Featured Images Extended plugin pretty much works right out of the box, but I do recommend setting up a Global Fallback Image, which I will go into below.
The Ajax Search Plugin can be configured how you like, but I recommend making sure to turn on any option that says to search Categories as well.
To get the data from the participants, I created a Google Form and embedded it in a page with some basic instructions and a link to more detailed instructions for those that need it. I just collected the information that I needed – but getting user images is a bit more difficult. Depending on our course, you may want to set up a different system for collecting user images.
The final part of the set-up was to create an initial post that contained the instructions for adding blogs to the hub. I kind of see this post as the cut-off point for older posts – anything older then this was probably not created for the course and can be removed from the Hub. This is up to you of course – you can keep older posts if you like. But this initial post also serves as a visual placeholder to make sure your blog display limit is high enough – if you don’t see the post at the end, then turn up the limit. I also use this post to create the global fall back image for the hub. I set up a default category for the blog, and then add an image branded for the course. The key is to check the “set as global image” option. when editing the Category to add the default image. This will set your course iamge as the default image for anything that doesn’t have one. This can help you to see any feeds that you set up incorrectly: if you see the image where it shouldn’t be, this signals you that something is wrong with that feed because it is falling back to the default.
Adding People to the Hub
This is where the time consuming part happens. It only takes a minute or two to set up each person, but once you get a long list of people it can add up. However, this is a time commitment that decreases over time once most people in the course that are going to sign up for the hub are signed up.
Since I used a Google form to collect information, I can get the results in a nice convenient spreadsheet. This is where the fun begins. Some people fill out the form great, others miss a lot. I try to extract a name, a link to a blog feed, and an image for each person. The name and image can be flexible, but if the blog link doesn’t work or has no RSS feed, I mark it as a problem and move to the next one. Additionally, I try to respect what people put in the form. If they say they are using a course tag instead of a full blog, but there is no tag, I mark it as a problem and move on. Once I get through the whole list, I send an email to those with problems with links to help them their issues (typically a form email with everyone BCC’d on it).
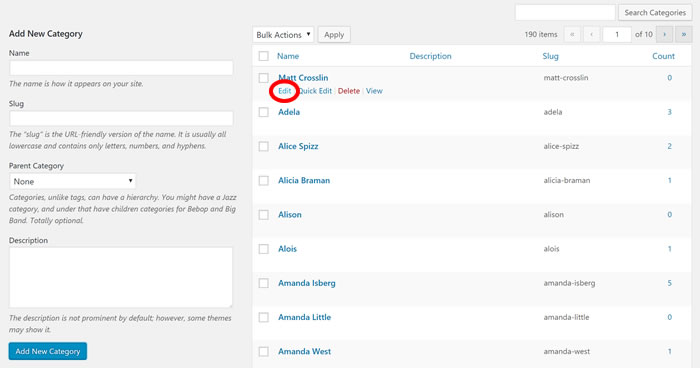
The first step is create a category for each person based on their name (or pseudonym if they choose). Sometimes I have to look at their email address or Twitter account to get a fuller name in order to make sure there aren’t several “John”s or whatever in the system (since some people only seem to enter their first name). As soon as you add a new category, it appears at the top of the list – very convenient. I click on the edit link immediately to add the default image for this participant’s category:
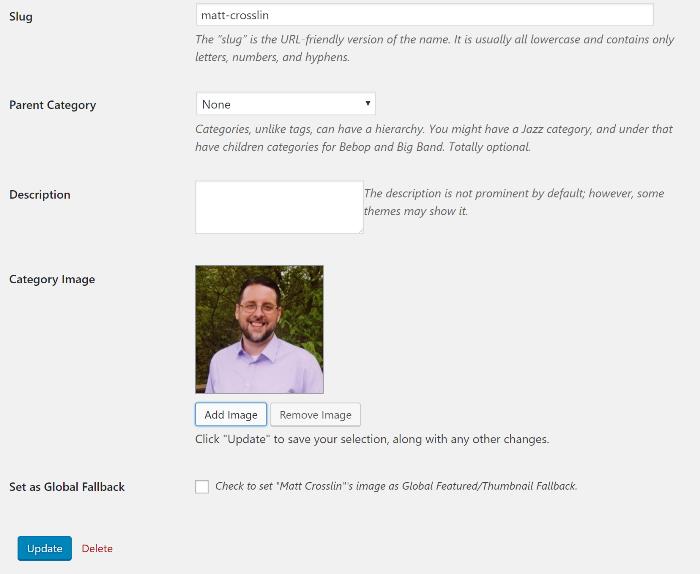
The “add image” option can be found near the bottom of the edit category page. Something to think about for images in the Morphology Lite theme: the system displays the image at full size on the front page. This will lead to a chaotic patchwork effect for images of different sizes. If you like that, then no problem. I really wanted to have an organized grid, so I manually crop and resize each image to 240px by 240px. This takes time, but gives a good grid for the final product.
A quick note on finding images. I tell people to have the image they want on their about page of the blog they use, but not everyone does that. Some of them I have to search the source code for an avatar that is hidden (WordPress loves to do this for some reason). Sometimes I have to pull one of the images off the header or sidebar of the blog. But since many of these are stock images within the popular themes, those run out quickly. So then I look for their Twitter avatar if they have one. But sometimes (more often than you would believe), I come up with no images – anywhere. So I basically run their name through jdenticon to get a unique image and move on.
Once you have an image associated with the category and have it updated, you should see it on the Category page:
The Next step is to go to the Syndication area to add the blog to the Hub. This is where it can get tricky as well. Not all blogging services work the same. WordPress works the best for full blogs and tags/categories. Blogger will also work for full blog, but you have to do some link trickery to get Labels (their version of tags/categories) to work (see Alan’s instructions on this one). Some services like Wix, Weebly, etc are just downright problematic at best. They might need RSS feeds turned on for the whole blog, and often RSS feeds don’t work well at all for tags/categories. See Alan’s instructions again on finding tricky RSS feeds.
Once you have the feed, you will need to add it to the syndication area found here:
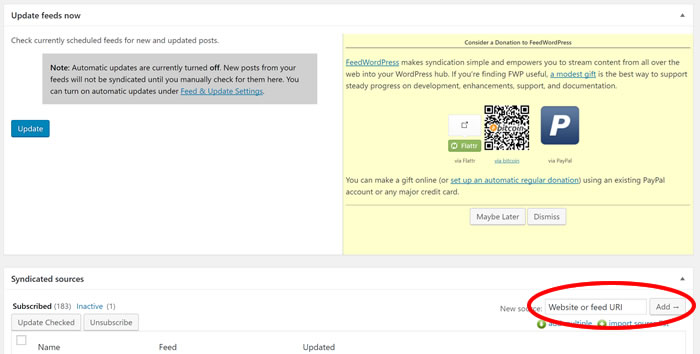
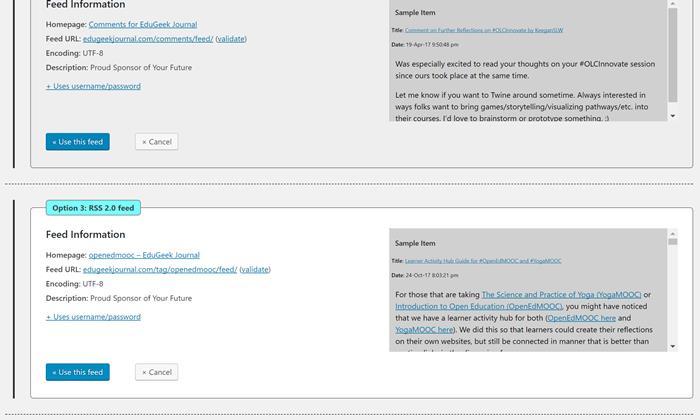
If a participant is using a full blog, then you usually pick the first one in the list that comes up when you click “Add.” If they are using WordPress tags/categories, you will usually have to scroll down to the third Option on in the list (which is the feed specifically for the category):
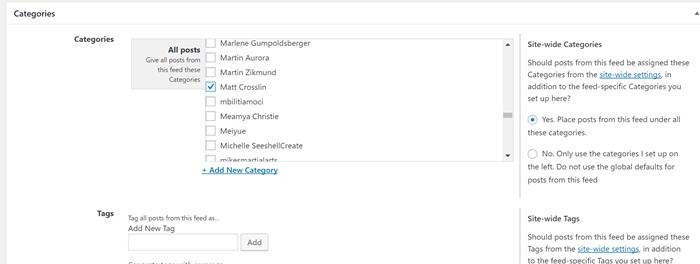
Once the feed is added, I will typically add the participant category right away while their name is still fresh in my mind. Scroll down to find the feed you just added. Of course, if you have a large class this list might get long after too long. If you are adding several and are doing them one at a time by following these directions, you can do a CTRL + F to search the page for “none” and this will take you to the new one you just added in the list since it (theoretically) shouldn’t have updated yet. Click on the “Categories” link under the feed you just added:

Then scroll down that page to find the category list, look for the person’s name you just created, click the box next to them, and save:
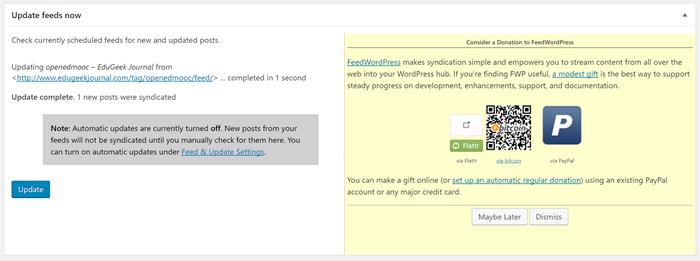
This will connect their category named after them (which is attached to their image) to their specific feed that you just added. What I usually do after this is go back to syndicated websites, search for the new feed again, and click the “Update Now” button next to it. This lets me check to see if everything is working while also clearing out the “none” next to the “last update” label so that I can search for the next feed I add easily. Once that is finished, it should tell you how many posts were pulled in:
If you are using Morphology Lite, there is still one step needed to add blog posts to the front page. Morphology only displays posts on the front page that are set to the post format of “Image.” FeedWordPress pulls in all posts as a “Standard” post format, even if you tell it to use the “Image” post format. That feature just doesn’t work in Morphology for some reason. However, it does give you the ability to moderate posts since you have to change each post to the correct format before it appears. Sounds weird, but you would be surprised how much non-course stuff I have gotten in the Hubs (resumes, recipes, and randomness, oh my!).
You can find the posts you need to update easily in the Posts list – Image post formats have an image symbol next to them, and the new ones just added should be missing it:

Click edit to update the post. Then change the post format from “Standard”:
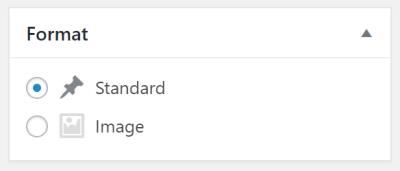
To “Image”:
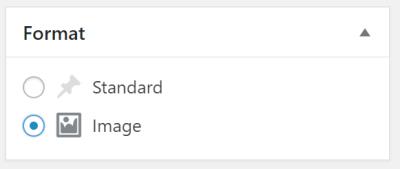
Save, and you are done.
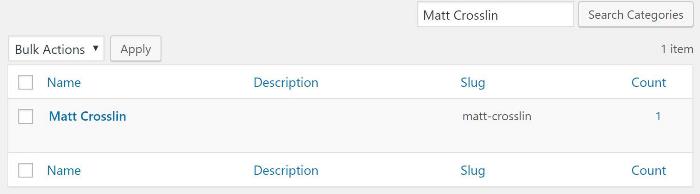
Alternatively, once you get a large number of posts, it may be hard to go into the post list and find one or two new posts hiding in hundreds of links. You can go to the Categories page and use the search bar to find the category you just added, then click on the number in the Count column to just display those posts from that category:
Then I usually like to go to the hub to make sure the new smiling face is in there, just to make sure:
That is about it – repeat until everyone is in. I will also send out a mass email to all that I added successfully as well as a mass email to those that had problems so that they will all know where they stand. A quick note: if people update their post on their blog, FeedWordPress will also update the related info on your Hub. This will reset the post Format back to “Standard,” and the post will no longer appear on the front page. You might want to go through the full post list from time to time to catch these older updated posts.
I tend to go through the moderation process each morning just to make sure it doesn’t pile up.
Hope that covers it all – I will update if I run across anything I forgot.
![]()
Matt is currently an Instructional Designer II at Orbis Education and a Part-Time Instructor at the University of Texas Rio Grande Valley. Previously he worked as a Learning Innovation Researcher with the UT Arlington LINK Research Lab. His work focuses on learning theory, Heutagogy, and learner agency. Matt holds a Ph.D. in Learning Technologies from the University of North Texas, a Master of Education in Educational Technology from UT Brownsville, and a Bachelors of Science in Education from Baylor University. His research interests include instructional design, learning pathways, sociocultural theory, heutagogy, virtual reality, and open networked learning. He has a background in instructional design and teaching at both the secondary and university levels and has been an active blogger and conference presenter. He also enjoys networking and collaborative efforts involving faculty, students, administration, and anyone involved in the education process.